Equipment used:
Canon EOS 5D MkI
Canon 430Ex Speedlite
1 x chicken bone
1 x chopping board, balanced on a couple of phone directories for height
1 x dining room table to place the dog and bits on, saves the older person lying on the floor
1 x white plate
1 x very naughty/stupid/lovable beagle
1 x piece of cloth over chopping board
Canon 430Ex Speedlite
1 x chicken bone
1 x chopping board, balanced on a couple of phone directories for height
1 x dining room table to place the dog and bits on, saves the older person lying on the floor
1 x white plate
1 x very naughty/stupid/lovable beagle
1 x piece of cloth over chopping board
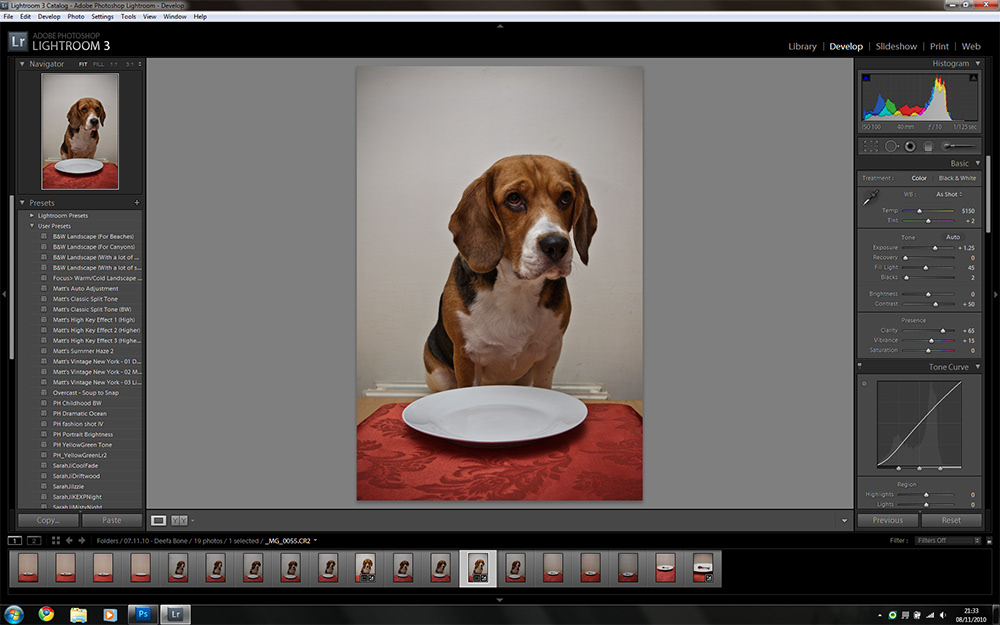
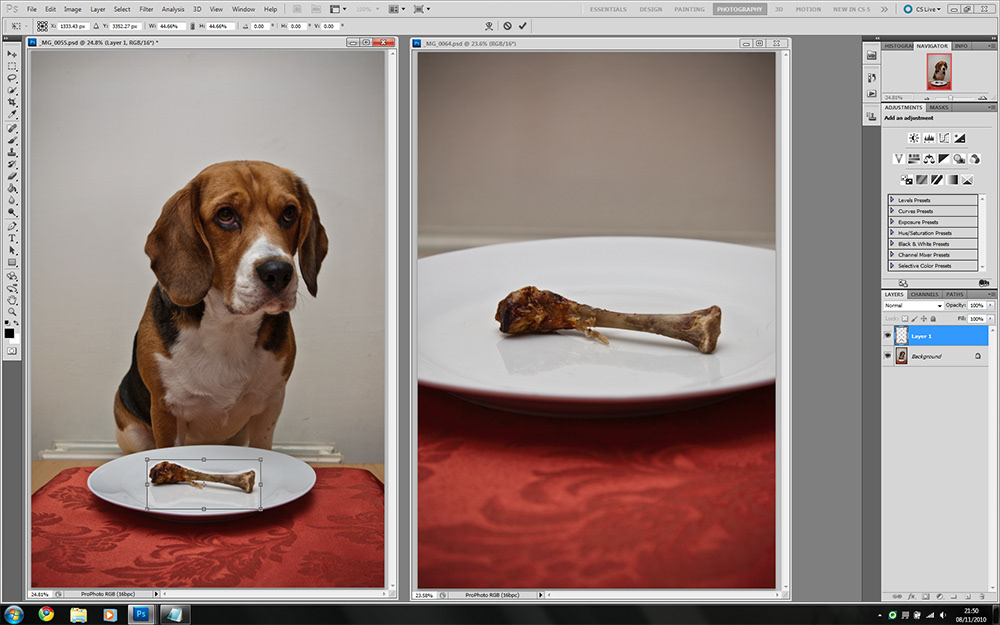
Step 1.
Pose your subject, the hardest part of the process for me, beagles are notoriously disobedient. Hopefully you'll have a dog that is easier to handle. If you have a mischievous dog like me, prepare to spend a bit of time on this stage and get someone to assist if possible.
Pose your subject, the hardest part of the process for me, beagles are notoriously disobedient. Hopefully you'll have a dog that is easier to handle. If you have a mischievous dog like me, prepare to spend a bit of time on this stage and get someone to assist if possible.
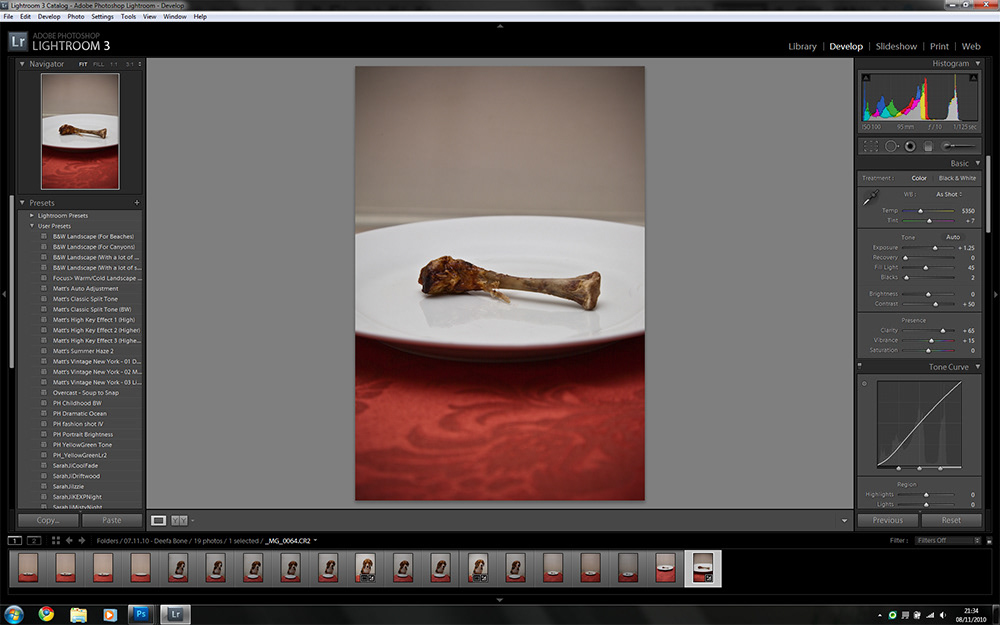
Step 2.
I couldn't put the bone on the plate, he'd have had it away in a nano-second plus please don't ever give a dog a chicken bone, very bad. So an additional shot of the bone, roughly the same angle and lighting. Don't worry too much, it's relatively easy to fool the human eye later.
I couldn't put the bone on the plate, he'd have had it away in a nano-second plus please don't ever give a dog a chicken bone, very bad. So an additional shot of the bone, roughly the same angle and lighting. Don't worry too much, it's relatively easy to fool the human eye later.
Step 3.
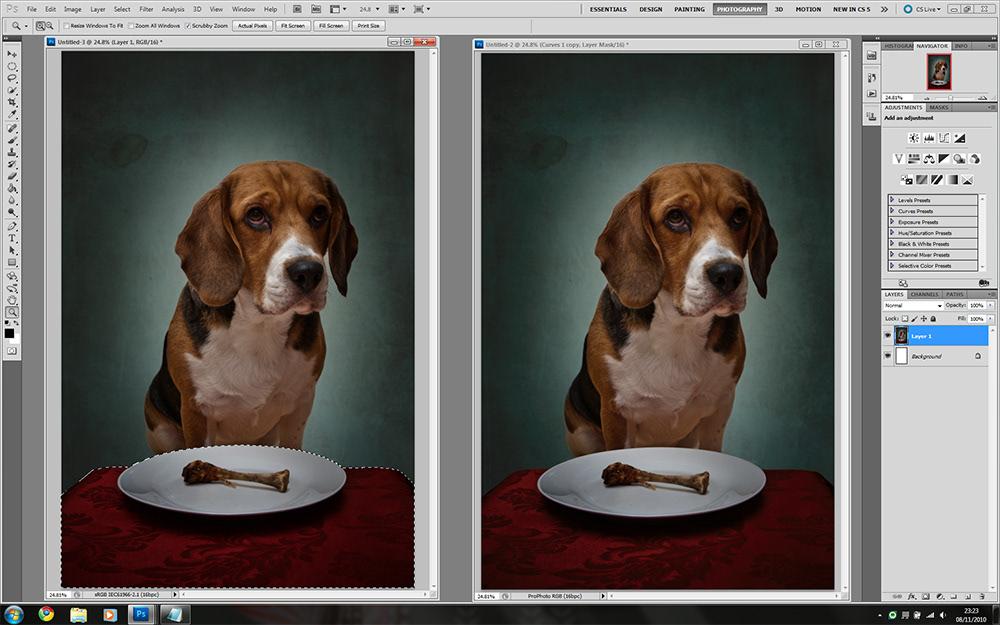
Open both images in Photoshop, and very roughly use the lasso tool to draw around the bone.
Either drag the bone over your first image or copy-paste it, your choice. On your main image you will now have a new layer called LAYER 1 with the bone on it.
Open both images in Photoshop, and very roughly use the lasso tool to draw around the bone.
Either drag the bone over your first image or copy-paste it, your choice. On your main image you will now have a new layer called LAYER 1 with the bone on it.
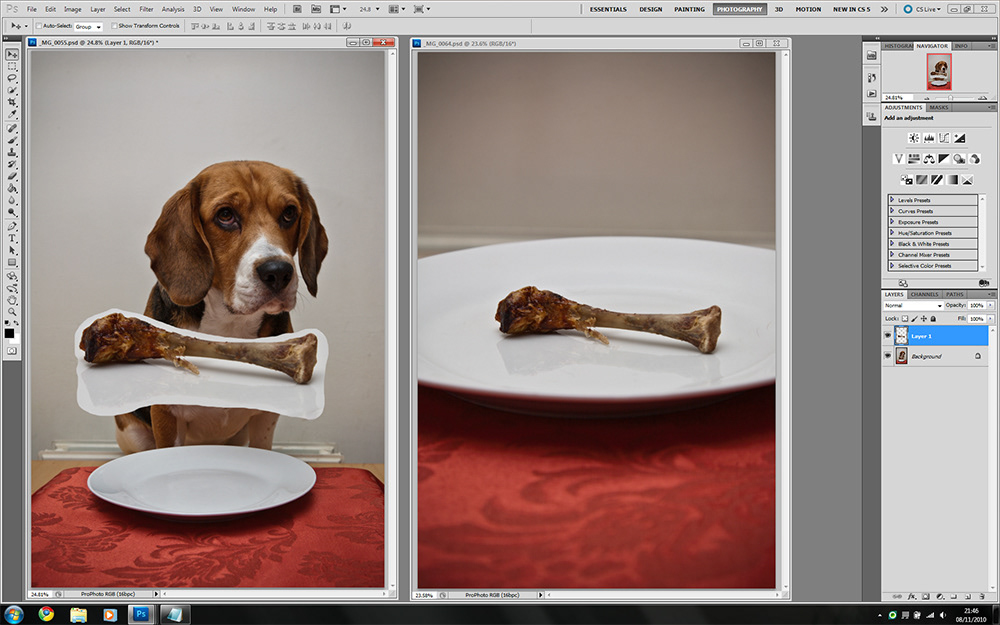
Step 4.
The bone is far too big for my image so lets resize it first of all, I hit <CTRL+T> to do this and use Free Transform, this enables you to rotate, scale etc all in one. Size the bone accordingly (tip if you hold the SHIFT key whilst scaling the aspect ration is maintained).
Once happy hit return to commit the size/rotation changes. Close the 'bone alone' image :)
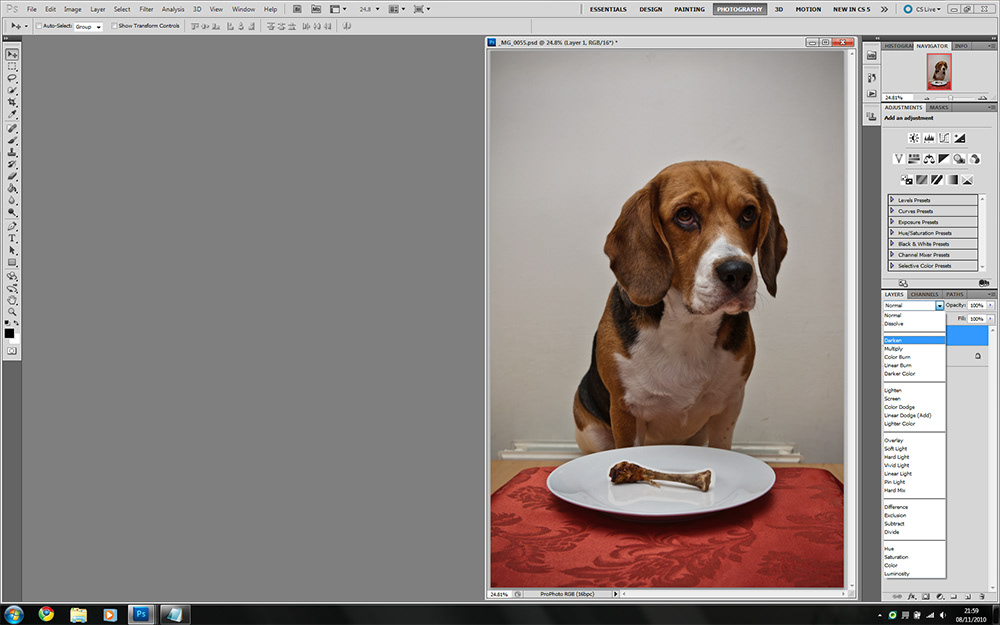
Step 5.
You will notice the bone doesn't sit that well in the image, the rough use of lasso tool is to blame. However, it's easy to fix. In the layers pallette make sure LAYER 1 is selected and then alter the Blend Mode to Darken.
Voila, zee bone now blends well. Please note a better job could be done here, but, fooling the eye is easy and for this image this is more than enough. Press CTRL+E to merge these 2 layers.
Step 6.
Press CTRL+J to duplicate the layer. We are now going to cut out the dog, there are many ways to do this. For this image and due to the fact that I shot it against a white background we shall use the Quick Selection Tool and then refine the edge. So, select the Quick Selection Tool or press the W key. Starting in a clean area of the image drag your mouse around the image keeping to the areas you want to select, if you have never done this before have a few practice runs first, but trust me it's the easiest thing you'll ever do. PS does all the hard work.
Press CTRL+J to duplicate the layer. We are now going to cut out the dog, there are many ways to do this. For this image and due to the fact that I shot it against a white background we shall use the Quick Selection Tool and then refine the edge. So, select the Quick Selection Tool or press the W key. Starting in a clean area of the image drag your mouse around the image keeping to the areas you want to select, if you have never done this before have a few practice runs first, but trust me it's the easiest thing you'll ever do. PS does all the hard work.
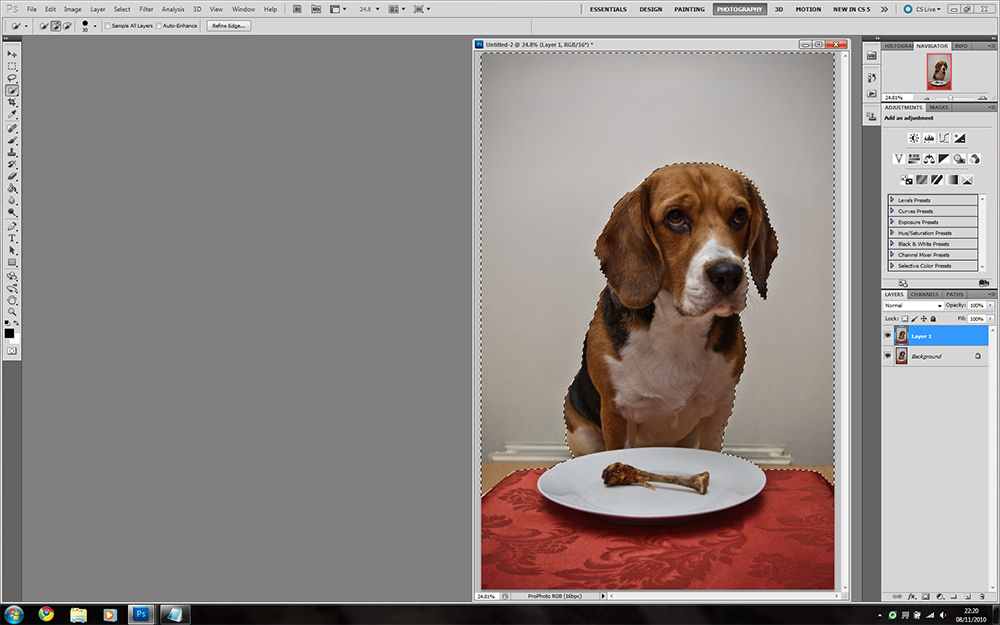
Step 7.
Click Select - Inverse Selection or press CTRL+SHIFT+I. Now Click Select - Refine Edge or press ALT+CTRL+R to bring up the refine edge selection. At the top of the screen click View and change to Black & White (this makes the edge easier to see) you may prefer on white or on black, it's up to you. As you can see though, the selection is not perfect, so let's refine it.
Click Select - Inverse Selection or press CTRL+SHIFT+I. Now Click Select - Refine Edge or press ALT+CTRL+R to bring up the refine edge selection. At the top of the screen click View and change to Black & White (this makes the edge easier to see) you may prefer on white or on black, it's up to you. As you can see though, the selection is not perfect, so let's refine it.
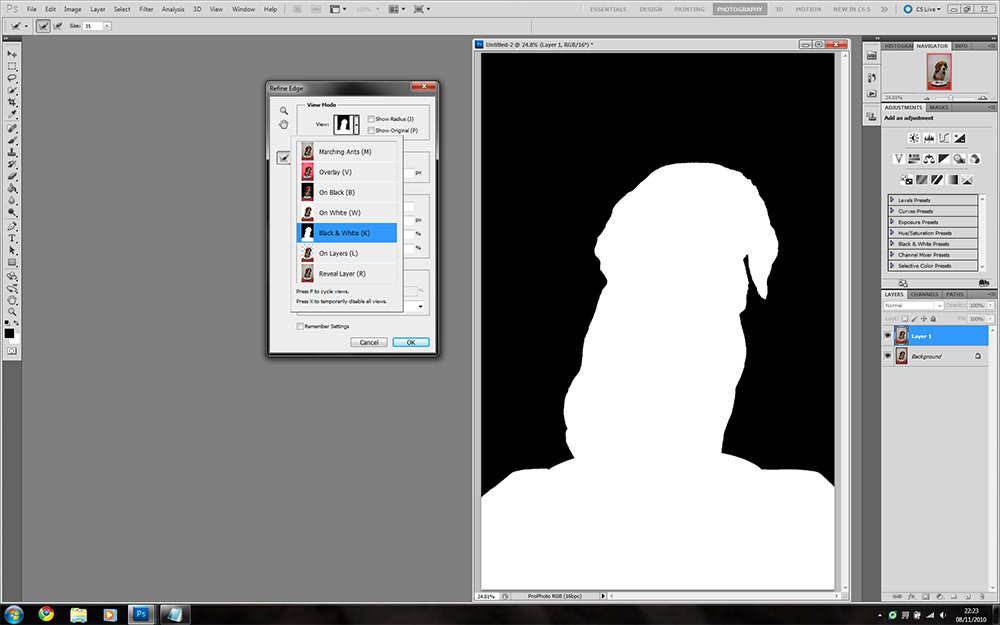
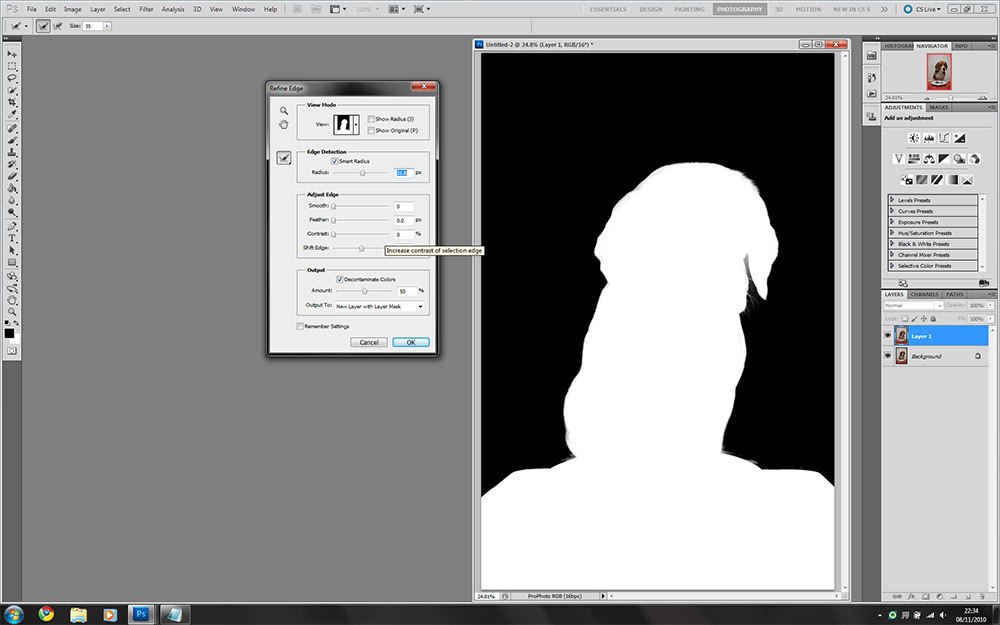
Step 8.
Tick Smart Radius, increase the Radius size to about 30px and then for the clever part, 'scribble' or brush around the edge of your selection.
Now, notice how Photoshop refines the edge, picking out all the hairs for a much better selection. Don't be afraid to go over the same areas again to get and even better edge. If you need to, you can also use the Smooth, Feather, Contrast sliders etc. to refine your edge even further. Once you are happy tick the decontaminate Colours in the Output section and output to New Layer with Layer Mask and finally hit OK.
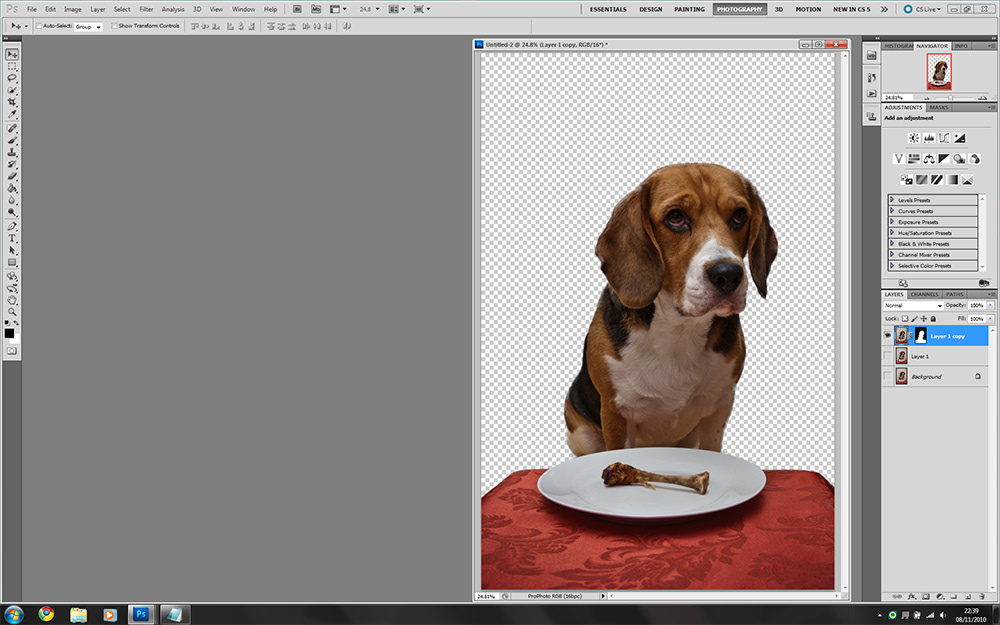
Step 9.
You should now have a new layer with the dog and plate etc all cut out.
Turn your bottom 2 layers off and check out your edges, they should all look as though a professional did it (the more you practice this btw, the better you'll get at it), if not don't be frightened to whip yer eraser out and give it a quick tidy up.
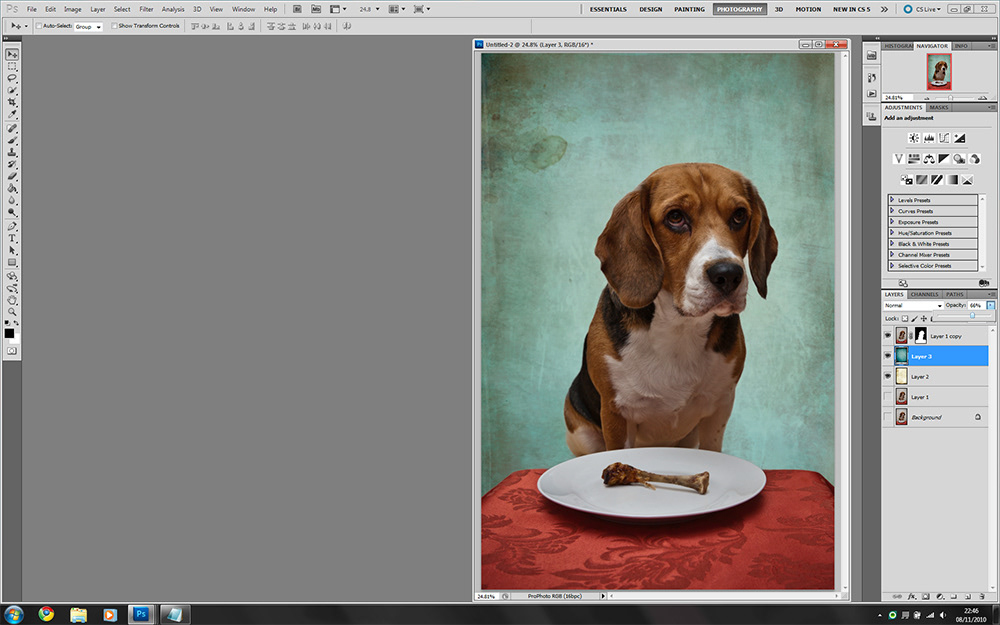
Step 10.
Let's replace the background now. I have thousands of misc images to use for this kind of thing, if you don't just google 'Grunge Backgrounds' and start building your stock library up. Download some grunge and paste a layer into your image, place the new grunge layer behind your cutout layer and resize using Free Transform as in Step 4.
Put another grunge layer on top of this one if you want and alter the opacity to around 60% or so, so that the bottom grunge layer 'shines' through the top one.
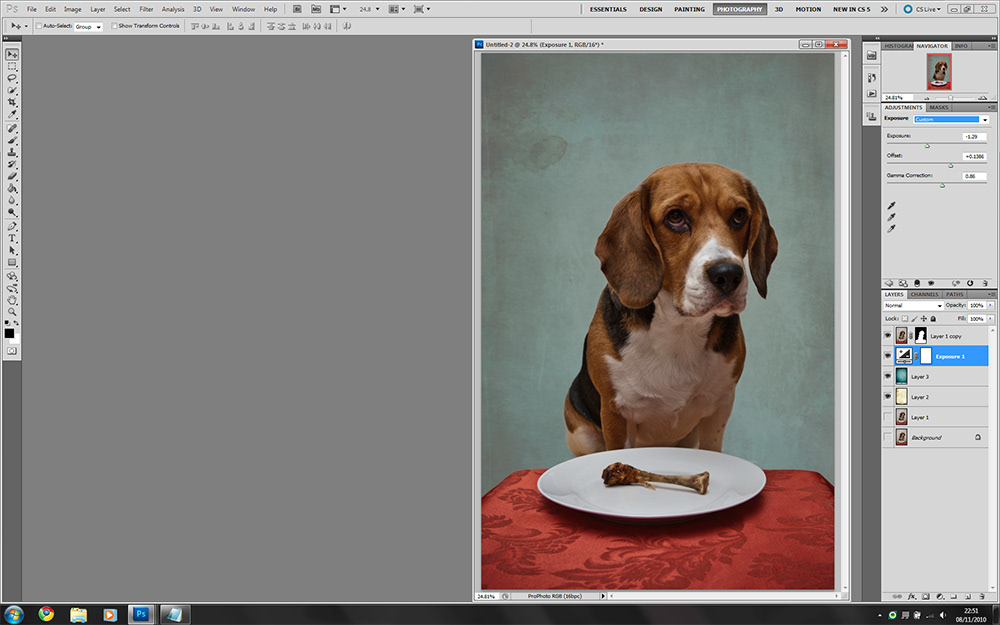
Step 11.
I then placed an Adjustment Layer on top of the grunge to knock the exposure down a tad. To do this at the bottom of your Layer Palette click the Black&White circle (New Adjustment Layer) and select Exposure, adjust the sliders accordingly.
I then placed an Adjustment Layer on top of the grunge to knock the exposure down a tad. To do this at the bottom of your Layer Palette click the Black&White circle (New Adjustment Layer) and select Exposure, adjust the sliders accordingly.
Step 12.
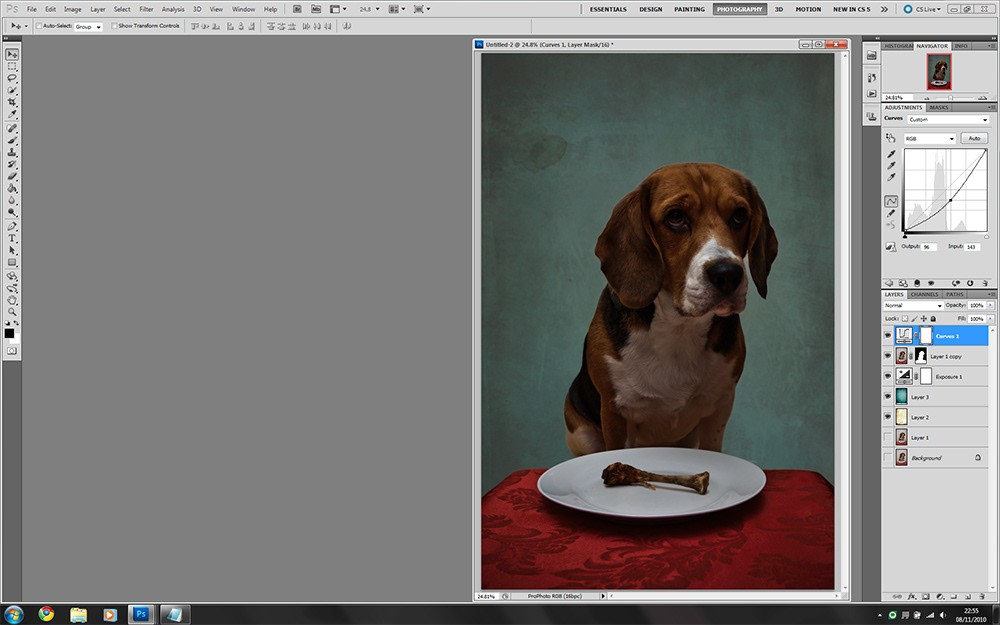
We are now going to vignette our image to emphasise the subject and darken where required. Select the top layer and then create a new Adjustment Layer - Curves. Grab the centre of the curve and pull down and to the right to darken the picture.
We are now going to vignette our image to emphasise the subject and darken where required. Select the top layer and then create a new Adjustment Layer - Curves. Grab the centre of the curve and pull down and to the right to darken the picture.
Step 13.
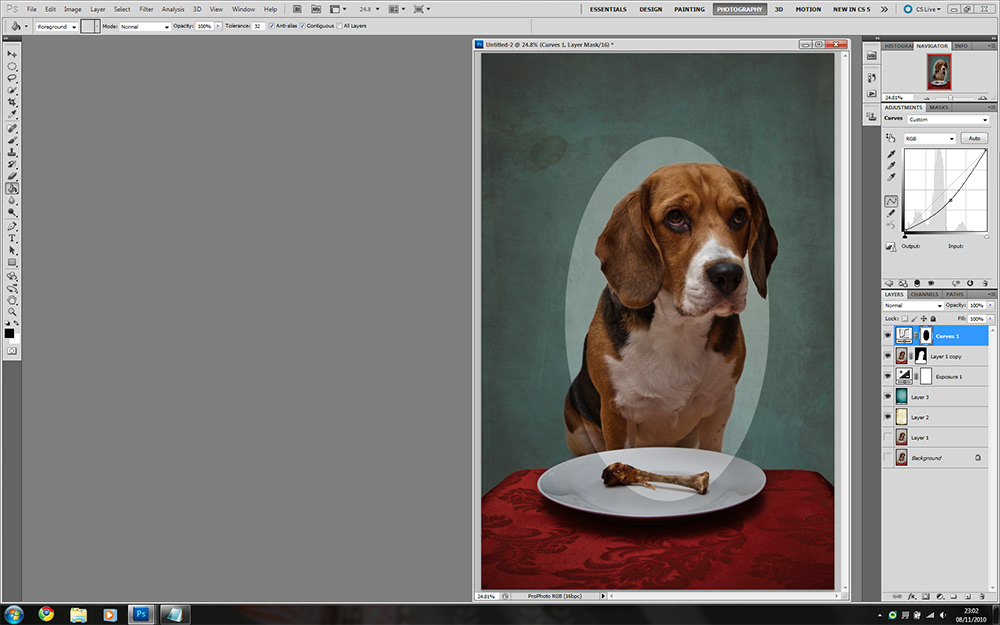
Choose the elliptical marquee tool, or press M and draw an oval in the middle of your image.
Select the paint bucket or press G and then in the layer mask of the curves layer fill it with black. Click Select - Deselect or press CTRL-D. Your image should now have a rather nasty looking light oval in the centre.
Step 14.
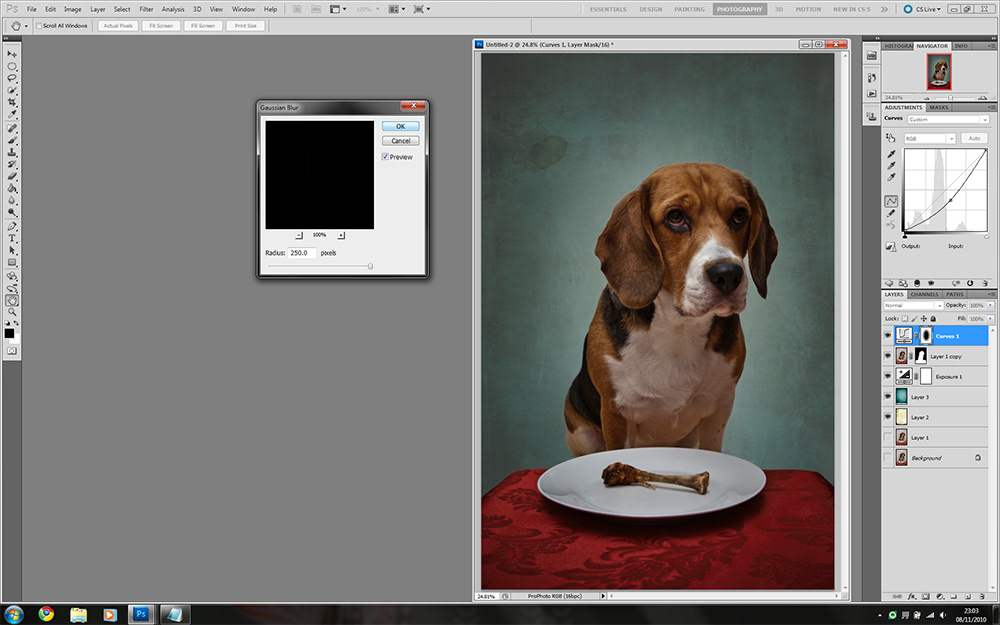
Click Filter - Blur - Gaussian Blur, Increase the Radius to 250 and hit OK.
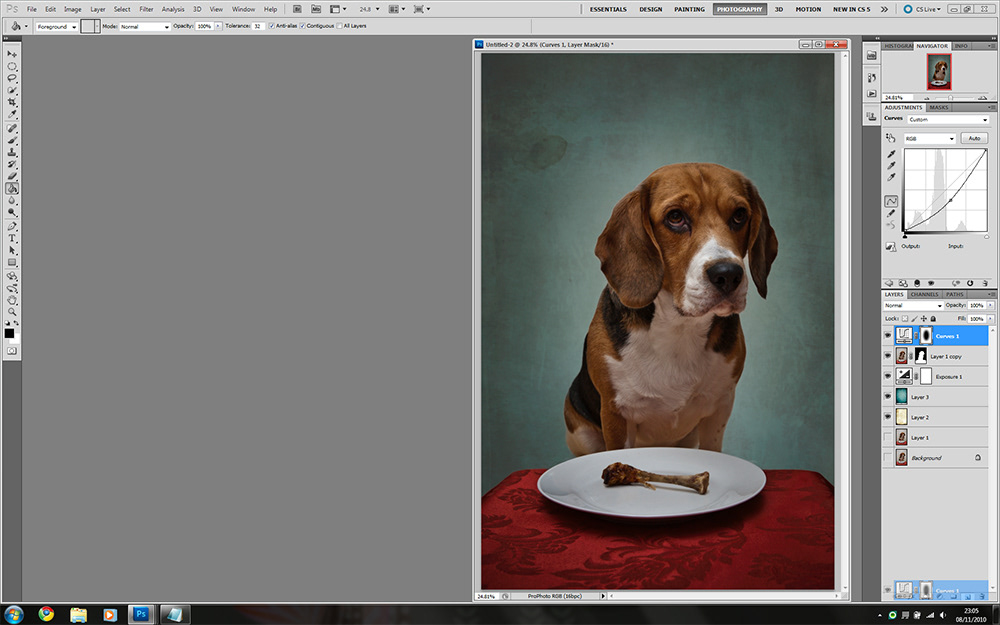
We now have a nice vignette. For me though I want to emphasise that vignette even more, so, grab your curves layer and drag it over the New Layer button at the bottom of the layers palette.
Double the curves and blur etc. in one step, easy. If you want even more then drag another one, if it's too much decrease the opacity on the top curve layer.
Click Filter - Blur - Gaussian Blur, Increase the Radius to 250 and hit OK.
We now have a nice vignette. For me though I want to emphasise that vignette even more, so, grab your curves layer and drag it over the New Layer button at the bottom of the layers palette.
Double the curves and blur etc. in one step, easy. If you want even more then drag another one, if it's too much decrease the opacity on the top curve layer.
Step 15.
For me now, the dog sits too high and looks like he's floating and spoils the balance of the image. So, lets balance the image a little. Click Select - Select All or press CTRL+A to select all and then click Edit - Copy Merged or press SHIFT+CTRL+C. Now click File - New or press CTRL+N the New Dialog window should appear and the dimensions etc. should have taken on your document sizes and so on automatically so press OK or hit Enter. Now click Edit - Paste or alternatively press CTRL+V.
For me now, the dog sits too high and looks like he's floating and spoils the balance of the image. So, lets balance the image a little. Click Select - Select All or press CTRL+A to select all and then click Edit - Copy Merged or press SHIFT+CTRL+C. Now click File - New or press CTRL+N the New Dialog window should appear and the dimensions etc. should have taken on your document sizes and so on automatically so press OK or hit Enter. Now click Edit - Paste or alternatively press CTRL+V.
Step 16.
You should now have a perfect copy of your first image all flattened. I suggest you save your other image and include all the layers so that you can come back and manipulate again at a later date.
You should now have a perfect copy of your first image all flattened. I suggest you save your other image and include all the layers so that you can come back and manipulate again at a later date.
Step 17.
Using the Quick Selection Tool again, draw around your table and plate.
Using the Quick Selection Tool again, draw around your table and plate.

Step 18.
Select the Move tool or press M and then drag the table/plate into position to balance the image a tad more, dead easy.
The only other thing I did after this was add a couple more adjustment layers just to more match my mood darkening the image a little more and that is it a completed image.
Select the Move tool or press M and then drag the table/plate into position to balance the image a tad more, dead easy.
The only other thing I did after this was add a couple more adjustment layers just to more match my mood darkening the image a little more and that is it a completed image.
I do hope the above all makes sense and you have possibly learned a few things, please enjoy and if you want to ask me any questions please feel free, I don't bite.
My final image can be seen in my miscellaneous gallery here